
How to calculate how much glass you need for a fused glass pot melt or screen melt or glass casting8/1/2017 This question has been coming up a lot recently on some of the glass fusing communities I'm on, so thought it would be good to do a post about it with my way of doing it and also links to some other people who have other ideas.
THREE WAYS TO WEIGH YOUR GLASS, WITHOUT MATHS! These are my 3 top ways of making sure you have the right amount of glass for your pot melt, screen melt or other melt. You can also use the "fill up with water" method for glass casting. 1) Cardboard Box Method: This is my favourite method because it's so simple! Use a piece of cardboard box, cut out the shape of your melt and then cover it in layers of glass pieces to make the depth you want. The good thing about this is you have a permanent "template" to go with your mould. Just add a bit for the pot! For a "normal thickness" melt you probably want 2 layers of 3mm glass (6mm), or 3 layers of 3mm glass, (9mm). If you don't have enough glass then your ring won't fill up enough, so if you want a perfect circle it's best to slightly over-cater with the glass. (You could use paper for your template, but I find it tears when I try and tip the pieces into the pot.) (Note: If you're just dripping on to your shelf, your melt is likely to come out as a circle and will spread so it is approx 6mm thick, so it's always a good idea to put a barrier or ring around the glass to make sure it doesn't run off your shelf!) 2) Weigh It Method: Weigh a 3mm piece of glass the right size for your melt. Write down the weight. If you want to end up with a 6mm piece (using the 3mm circle as a base to drip on to) then put the same amount of glass in the pot, plus a bit (as some always stays in the pot). If you want a 9mm piece put twice as much plus a bit in the pot. If you're not using a circle of glass on the bottom then put more in the pot to compensate. Note: This is the most accurate non-maths version! 2) Fill It With Water Method: Another way, which is really helpful for weird shaped melts like fish and stuff, or for glass casting, is to put plasticine all round your metal melt circle, in a deep tray, fill it up with water as far as you want to have your glass, pour into measuring jug and then use the same volume of glass (not weight as glass is heavier than water) plus a bit for your melt. (This assumes you are melting into a stainless steel casting ring. If you are then you don't need to add extra for the pot as the circle will be a bit smaller once you have lined it with fiber paper so you'll have a bit spare to leave in the pot). THE "MATHS VERSION"! Square melt: length x width x depth. Circular melt: 3.142 (pi) x half width squared (r squared) x depth. Then multiply by 2.5 for weight of glass, and add a bit for the pot. (e.g. 10cm square melt x 6mm deep would be 10 x 10 x 0.6, which would be 60, x2.5 for weight of glass = 150g plus a bit for the pot) (e.g. 10cm circle melt x 6mm deep would be 3.142 x 5x5 x 0.6, which would be 47g, x2.5 for weight of glass = 118g plus a bit for the pot.) LINKS WHICH CALCULATE IT FOR YOU There are also several pot melt online calculators and tutorials out there, which can help you with this:
(You could use paper for this, but I find it tears when I try and tip the pieces into the pot.)
1 Comment
Fused Glass Tutorials - How to do Raking Raking (or combing) hot glass in a kiln, while it's on, can be a very scary thing if you haven't done it before. Before you start, at least a moderate amount of glass fusing experience is essential. If you're feeling a bit daunted by it all, or aren't sure it's going to be for you, then attending a class with a reputable glass course provider will mean you haven't invested in all the safety gear for nothing. If you have a decent amount of experience and your own kiln, and think you'd like to have a go, first take a look at pictures and videos of other people doing raking - that will give you an idea of the kind of safety equipment you need and the processes involved. Here's a helpful starter list (which may not be completely comprehensive) - please do feel free to add your favourite raking tips in the comments!
The larger your kiln, the better and more comprehensive safety gear you will need. Having a bucket of water handy is REALLY a good thing. I set fire to my gloves the first time I tried raking because I was too slow and my rake was too short!!! Also, have some heavy kiln bricks / hot damz to put around your thing you are raking to stop it moving about when you poke it. Line them with 3mm fiber paper. The glass needs to be really red hot to move easily. Don't be afraid to shut the lid and let it heat up again between pokes. Always wear closed toe shoes (preferably leather, or steel toe caps!) and old natural fabrics - you can melt things straight on to you if you're not careful - at least with natural fabrics you'll get the charring not the melting! If you're still going OMGSCARY then try it in a microwave kiln or try some lampwork beadmaking or enamelling, or use a baby test kiln like a Paragon SC2 which has front opening door so easier to handle with just one person. Raking small scale is actually quite cute and gets you over THE FEAR a bit before trying a bigger piece! Top tip: Thinfire paper can disintegrate if you rake too deep. A nice smooth kiln washed shelf or a 3mm layer of fiber paper is best, and/or a layer of clear glass as your bottom layer. Always make sure there's someone else standing by - don't do it in the studio on your own! For some helpful videos on raking, take a look at these youtube videos: Absolute basics, "raked stripy puddle style" in a dinky kiln (but please please please use proper safety gear!) From "The Edge of Glass". You can see more of Tim Worral's spectacular work at www.theedgeofglass.com
 Raked Fused Glass Work by Tim Worral
You may have seen those little clear glass christmas ornaments with impressed stars and other pretty shapes... it's done with fiber paper.
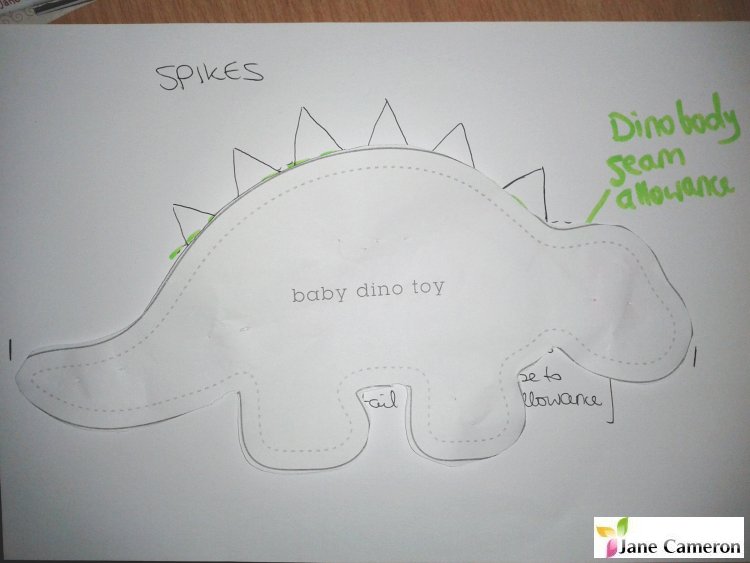
For mine, I use 3mm thick fiber paper (not sure what that is in inches!). The thicker the paper the more obvious the impression. I cut the star, or tree, or heart, or other pretty shape out of the fiber paper, then put it on the primed kiln shelf with two layers of 3mm glass on the top and a little loop of wire between them to hang it from later. You could also add another loop at the bottom to hold beads or other decoration. You can obviously make your glass any shape - squares, rectangles, tree shapes, diamonds, circles, you name it! You can use nichrome (high temperature) wire, or copper wire (which goes black but can be revived by soaking in a layer of tomato ketchup ... what is IN that stuff??!). I don't advise using galvanised wire as this gives off nasty fumes when you fire it. You could always drill a hole in your ornament instead, if you prefer. If you decide you're going to use thinner glass (e.g. one sheet of 3mm) then you need to use more of a slump firing than a "full fuse" firing, as otherwise it can get really thin at the joins if you fire too long. Also you'll have to drill your holes rather than fusing your wire inside. Once it has been fired, you'll find that the fiber has somewhat stuck to the bottom of your glass when you pick it up. Making sure you are wearing your breathing mask, I tend to dunk my ornaments in a pot of water and let them soak for a bit, then scrub off the fiber, then rinse. This way you can let the ceramic residue sink to the bottom of the pot and dispose of it properly (bag it and bin it) rather than letting it block up your sink trap. To make your items 3D, you can slump them (if you want your design to stay nice and sharp then you need to slump gently) - It's not such a good idea to leave the fiber behind the glass when slumping as it can fall out! But if you're adding additional tack fused decoration to a flat piece then I'd leave the fiber behind the glass to help it hold the shape. You can put more than one layer of fiber on if you want a more 3D effect, but be aware that higher piles of fiber can make the glass really thin if fused too long, so you'll need to do a bit of experimenting to make sure it holds well. There are a range of fabulous free tutorials available on the web, including Bullseye Glass's fantastic kiln carving tutorial. Glass with a Past has one about kiln carving with bottle glass. Here's one with the basic process from Glass Fusing Made Easy and another one with some images for inspiration. Paul Tarlow has also written an ebook about it which you can buy. Have fun! Excitement! Thanks to the lovely people at Farnham Maltings, I have a pair of tickets to give away to Thread: a festival of textiles at Farnham Maltings on Saturday 24th September. I'll be there on the Guild of Silk Painters stand. If you'd like to win these then please email jane@janecameron.co.uk by 15th September, with the title THREAD TICKETS. Good luck!  Everyone who gets in contact will be added to my email mailing list to receive occasional emails. There will be one winner, who will be drawn on the 16th September 2016 and who will receive two tickets. The winner will be contacted by email and asked to provide their UK postal address. The tickets will be sent out by post. If the winner does not respond by the 19th September another winner will be drawn. You can find out more about Thread here ... Plushie Denim Dinosaur Hello everyone! I decided it was about time for another random craft project. I was browsing Pinterest (yeah, hand me a picnic basket and come back in a week!) and found a plushie dino pattern so I just HAD to make it. The dino pattern I found was originally designed as a taggie toy, but I have made a few changes... Many thanks to http://firstdayofmae.blogspot.co.uk/2013/05/baby-dino-pattern.html for the original design.
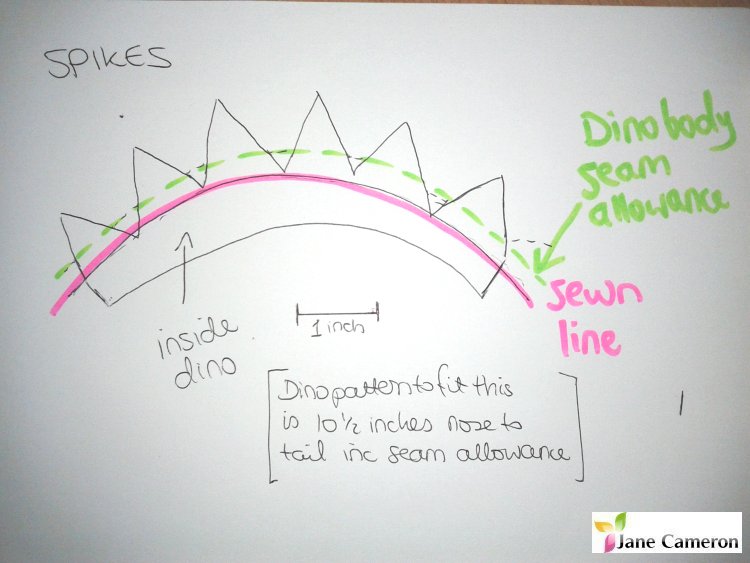
I took a pair of my husband's old jeans, which were no longer suitable for wearing, and cut them up to liberate the fabric. I kept the legs for later and used the offcuts from around the top for this project. I printed the pattern out as large as it would go on a piece of A4. I cut out two dino shapes. Then, rather than adding strips of ribbon for the spikes, I cut out a curved strip of denim with spikes on as I thought this would be more fun (and less hassle!). The denim will fray a bit but I quite like that it's going to do that (If I'd thought about it I would probably have sewn around the tops of the spikes to control the fraying!). The original tutorial told you to make your toy in the traditional "right sides together with spikes facing in on the inside, sew most of the way round, turn right side out, stuff, sew up" way. I decided I couldn't be bothered to try turning denim inside out tonight so did it a bit differently...
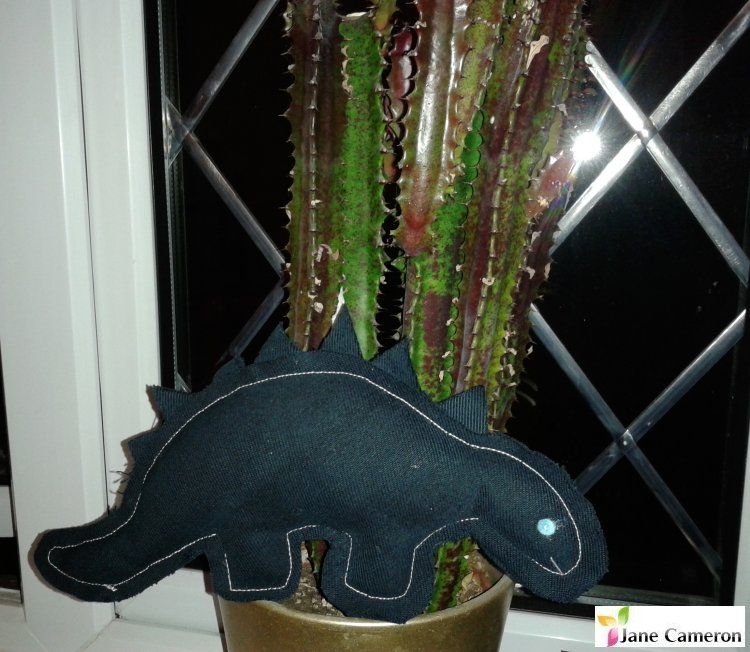
Cutting out Cut out fabric, leaving seam allowance as suggested on the pattern Cut out curved strip with spikes on Cut two tiny coloured felt ovals (about 1/4 inch) for eyes (You could use beads if you don't want this to be child-friendly) (You could sew the eyes on at this point, if you want to machine sew them on and know exactly where you want them to go...) Assembly Assemble dino right sides out with spikes sticking out of the top Sewing Sew most of the way round along the pattern line, leaving the seam allowance sticking out. Leave a space along the tail for stuffing (this will be sewn up in a moment!) Stuffing Get your soft toy stuffing (or random felt / fleece / fabric scraps) and fill your dino as full as you like. Use a pencil or knitting needle to push the stuffing into the head and feet and tail. Finishing Once full enough, squeeze dino back into your sewing machine again and sew up the gap (or you could do this by hand if you're neat at hand stitching!). Now it's time to sew on the eyes and sew one stitch on each side for the mouth. I used the knot in the end of the thread in the centre of the eyeball, but you could always use a bead (not child friendly) or a proper french knot. The raw denim edges will gently fray as time goes by, giving your dino a lovely shabby chic look. To speed this up, pop him in with your next "40 wash" in the machine. Enjoy! 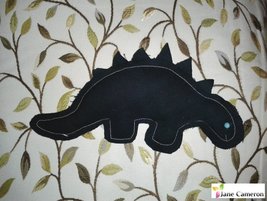 Things I would do differently next time ...
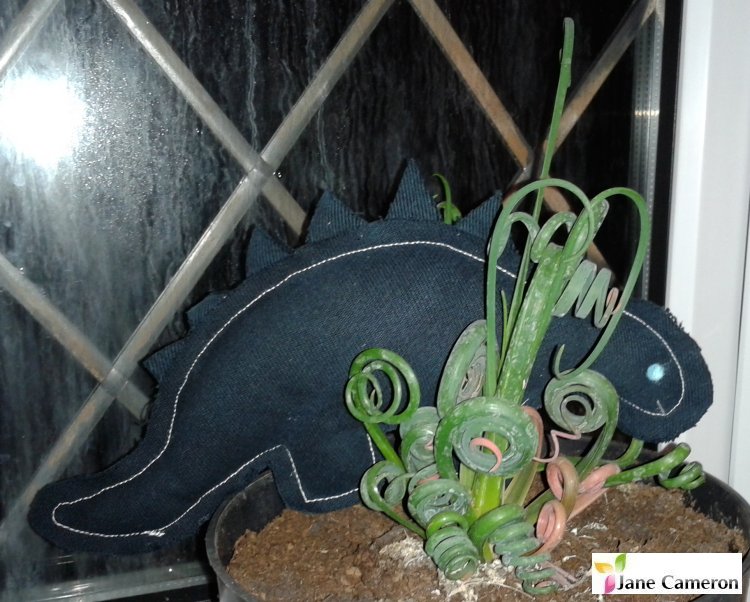
I'm not sure there is anything I'd really do that differently next time. I love the silhouette look with the white thread and the black denim. I think the little blue eyes and the mouth give it a lovely personality. The only thing I might do is sew round the edges of the spikes as well, possibly in matching thread, so that they don't fray so much. Other options:
If you're running out of room in your house/garage and are looking at building yourself a workshop or studio in the garden for your glass fusing, here are some things to think about:
Size matters Yes, size does matter. Partly because your local planning regulations will tell you how big your new workshop can be and how close to the house it can be, and also partly because it needs to be able to fit all your stuff! Get the biggest workshop you can afford which is within the regulations - you can never have too much room! If you want something bigger, you can apply for planning permission but bear in mind that this will take longer / be expensive / make the process a lot more complicated. Be a good neighbour It is also worth having a chat to your neighbours before you make your final decision on location, to make sure that they are on side. Also, if you put your shed right up against the boundary remember that you won't be able to put a gutter on that side without their permission, nor will you be able to get down there to paint that side of your shed! It's a good idea to leave an 18" gap, or enough for you to squeeze down with a paintbrush, as that will help to reduce issues in the future and keep your workshop in good condition. Are you tall or short? Think about what height you would like your work bench to be - do you sit or stand when you cut glass / design your pieces / work on your grinder etc. You might want to have a couple of different heights of bench as if you're working on your tile saw that adds at least 6 inches to your working height. You can never have too much workbench! Ceilings Check your ceiling heights, especially if you are tall or you like to stand up to work! Sheds / workshops tend to be a bit low and can feel claustrophobic if you're in there all day. Wet work or dry work? Do you do a lot of coldworking? Do you want to make yourself an area you can hose down? You could use lino flooring and put a plug in the middle with a sink trap underneath to catch the glass particles. Shower curtains also make great protective screens. Power Yes, power. Get a qualified electrician to give you some advice about powerpoints - you can get cable laid to your new workshop and it can be on its own fuse board - this is the best option and much safer - means if something goes phut it won't take the house down too! Webcam Yes, I said it, webcam. If you can get a webcam into your shed, especially if your kiln will be in there, it's a really good idea as it means you can check on your kiln from the comfort of your house in the middle of the night, rather than having to brave the British weather and unexpected slugs! Path If you're going to have a workshop at the end of your garden, you need a path wide enough for a sack trolley so you can get your heavy glass deliveries down there. This also reduces the amount of mud trekked into your workshop by you / your students / the cat! Also you need to get your kiln down there somehow too! Your kiln and the width of your doorway Yes, your kiln needs to fit through the door. Double doors (or 1.5 doors - one big one small) are a really good idea. I like the "one big one small" type of doors as it means you can walk through normally most of the time and just open it up when you want extra air or need to move something big. Also bear in mind that your kiln will need clearance around it, so do leave an extra foot or two all round when you're planning, especially if you do a lot of hot work / casting. Floor Be sure about your floor. You want something you can sweep and mop, and that is smooth enough that it won't hold on to glass particles. Some people have poured concrete floors, but this can be really cold on your feet - it's a really good idea if you do vitrigraph though as the hot glass can melt other floorings. You can get industrial carpet, but I'm a bit wary of that. Lino is lovely, and you can get underlay with it too if you want to be really comfyposh! Storage One of the most important parts of your studio. Consider shelving with covers or curtains in front, even transparent ones, as this stops the dust getting all over your supplies and moulds. You'll want somewhere near the floor to store sheet glass, vertically, plus storage for smaller sheets, and scrap (keep it separated by colour - heavy duty ziploc bags can be good if you don't have a lot). Also frit and powder - those "over door shoe storage" pocket things can be quite fun as a starter, or those "narrow shelving for cans" - try Lakeland - are great for the 450g jars. Do not underestimate the growing power of your supplies stash! Moulds can go higher up, but again make sure you have enough room and that you can either wrap them or put a door on the storage so they don't get dusty. Underglaze pencils can be great to write reference numbers on your moulds, and also to make a note of which kilnwash / MR97 spray you have used on which mould. Insulation and Heating Get insulation for the walls and ceiling so you can work in there in winter and remember to allow for this in your floorplan as it will take about a foot of length/width off your shed. Remember that your nice warm kiln won't be on all the time. A little wall mounted bathroom heater is a lovely thing, as are those mini oil filled radiators. If it's just your feet that get cold you can actually get battery powered heated socks (look into motorcycle gear!). Water You can run the garden hose up if you need to, but a water butt is a good way to have some basic water out there without needing a plumber ... if you mount it above waist level you can have other storage underneath and also get some water pressure! Working outdoors You might want to have an outdoor area for doing work during the nicer 3 days of summer, or for doing messy cold working. Covering this with an awning or possibly polypropylene sheeting means you can use it even when it's raining, and can also be a great place for sitting out during your annual monsoon BBQ! Do make sure this area has a floor you can sweep or mop so you don't get glass in your grass. Lighting Those new LED bulbs are nice - I have one of the "100w equivalent white light" ones in my art room and it's lovely. What shed? Wooden sheds need maintenance and can be draughty if not lined, but are easily repaired. You could consider a portacabin style building, or a concrete garden room if you wanted something more permanent. Security Do think about security, and insurance, as that's a lot of kit to leave out and about. The guy who put up my shed told me he once had to go and fix someone's shed when someone had removed the whole wall to get the stuff out! Also, he told me don't get a metal shed - they're horrible for ventilation, they rust, and you can basically break into them with a can opener!!! Bases If you want your workshop to last, make sure you get a decent base put down. You can get concrete poured to make a hard standing, and for a permanent workshop that would be a good idea. If you want a more affordable / moveable option then you can put down heavy duty landscape fabric and then use wooden bearers to hold up your shed. If your garden is damp / subject to flooding then seriously consider having your workshop up on stilts! Windows I'd get as many windows as you can for light, but be aware that there's a balance with security. Make sure at least one of your windows opens.If you want to self build or get someone to make you a workshop then you can often pick up double glazed units very cheap in odd sizes (cancelled orders etc) from your local double glazing supplier. If you're going to be teaching then good light is essential - you could consider a skylight but sunburn ... blinds for the windows are a really good idea too as it means you can shut them at night, and also you can pull them down to stop the sun getting in your eyes. Ventilation Get an extractor fan. A good one. Ask your local glass supplier to make sure you have the correct extraction for your needs. Health and Safety / Fire Safety Don't mess with your health. Have a designated space (near the door) where you keep safety equipment, a suitable fire extinguisher / fire blanket, appropriate goggles / gloves / aprons, and eye wash / steri strips etc. You may not be able to get to the house in an emergency. Personal safety It's a really good idea to take your telephone down to the workshop with you as you are working alone and your home address may be on the internet. Also, remember to lock your house if you're working in your workshop. Gallery Your new studio isn't necessarily just a work room, you may want to use it as a gallery or a teaching room too. If you teach, then this room is much easier to double as a gallery than your active workshop - it can be quite frustrating having to be open for customers if you're feeling inspired and can't get into your workshop as you've had to clean it all up! Teaching If you're teaching, then have plenty of room, make sure you have cupboards where you keep the things they're not allowed to use, and a separate set of storage for the things they are allowed to use. Bear in mind that, although you may be used to standing to cut all day your students may not be able to, so do have stools / chairs available for everyone and bear this in mind when planning your workshop space. I hope that gives you some things to think about. If there's anything else you think I've missed, please do leave me a comment! Some of you may know that there has recently been a major upheaval in the fused glass industry, with one manufacturer shutting down completely and others having curbs put on their production until new environmental controls have been installed. With prices going up as a result, this has obviously made lots of us think quite seriously about our profession or our hobby and about how we could do things differently if these products were not available.
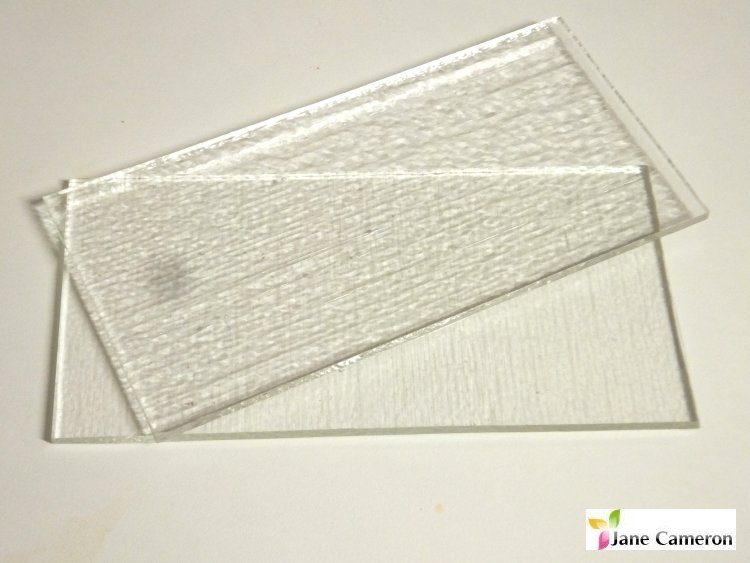
One of the options is to use float glass. Float glass is window glass. It's much cheaper than fusing glass, comes in big sheets, and can be obtained easily from your local glazier. You can also buy some coloured float glass, though it is expensive and you need to be sure that it is coloured and not coated. You can buy compatible frits and powders too, from Kansacraft. One of the reasons float glass is cheaper is that it isn't compatibility tested. However, if you fuse pieces from the same sheet they will be fine. The coefficient of expansion (COE) is the thing which restricts which glasses you can melt together, as if the pieces are too different they expand and contract differently and will, over time, crack your artwork. You can also use bottle glass, but again the best thing to do is only to use bottles singly, or if you cut them up only fuse pieces from the same bottle together, as otherwise compatibility problems can occur. If you want to add other colours and textures to the top of your glass you can use glassline pens, compatible frit/powder or enamels (check that these are compatible with the glass you are using before you buy them). You have a lot of options for "between" the glass too ... some of these are "bubble paints" (oxides), metal foils, sheet and leaf, and mica. Obviously you can also use wire to form hanging loops or shapes between the glass. (If your wire goes black where it sticks out of the glass you can clean it by soaking in fizzy cola!) Devitrification (surface crystallisation) of the glass is often an issue with float glass - there are sprays you can buy (Spray A) which can help to minimise this, but making sure your glass is clean and using the right firing cycle makes a huge difference too. Glasswithapast has some fabulous information on how to use float / bottle / recycled glass, including projects and firing cycles, and is well worth a look. Happy fusing! If you find these posts helpful please do leave a comment, subscribe to my blog and/or follow me on Facebook! Yes, I'm sorry, Christmas in June! Well, it's 115 days to Christmas apparently, so the Great Festive Countdown (yeah ...) has already begun!
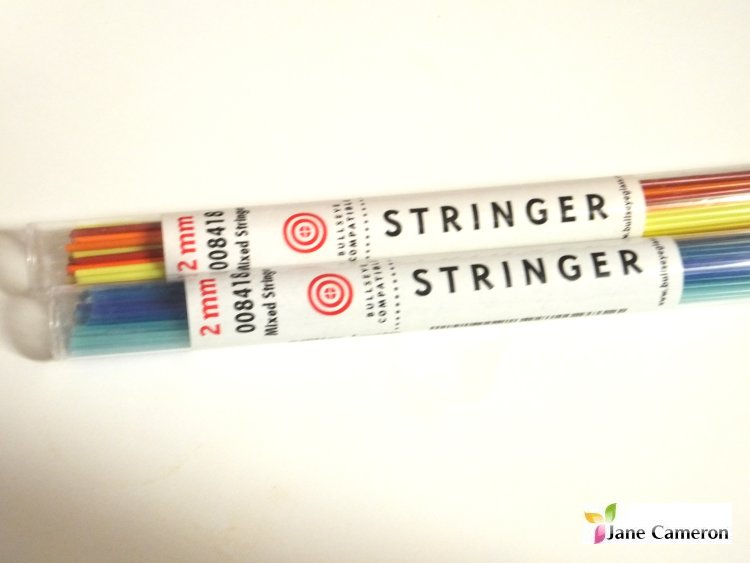
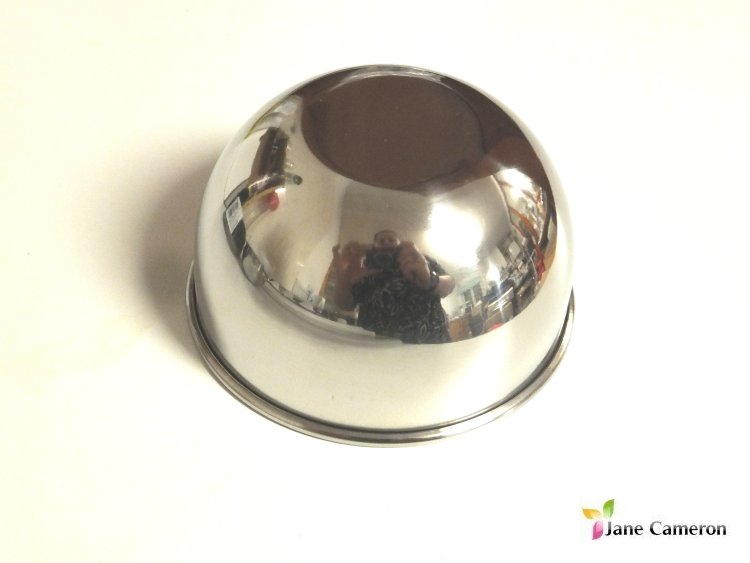
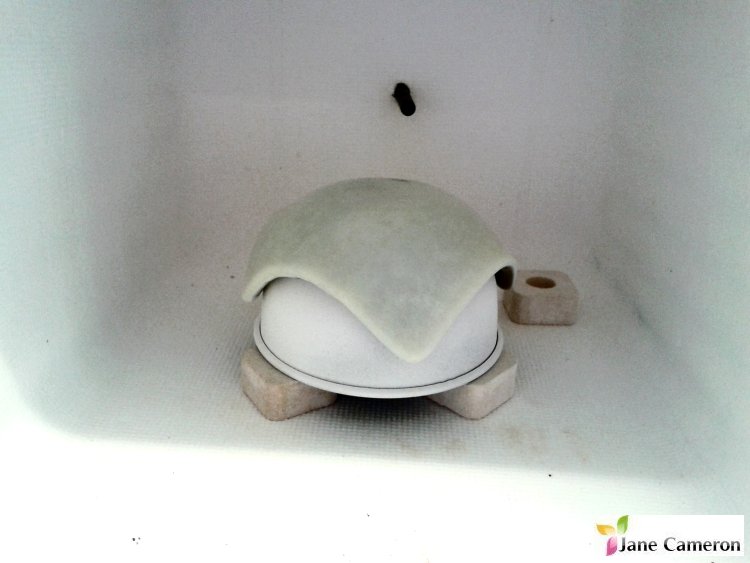
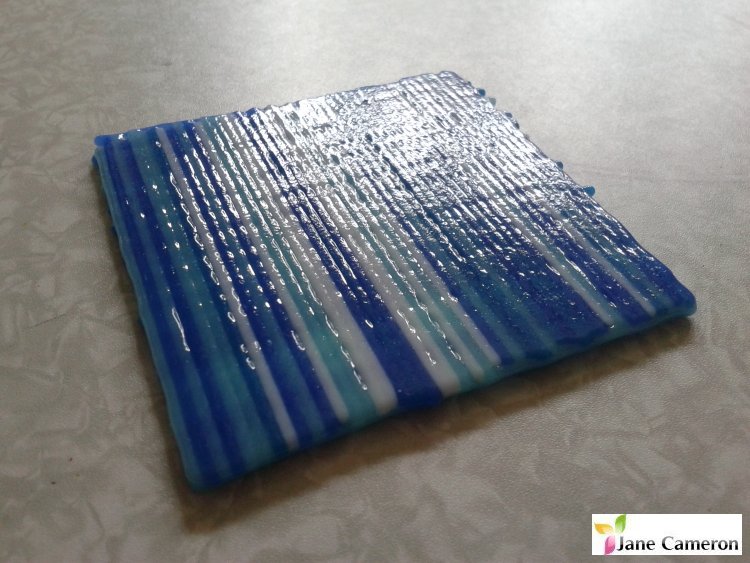
To be honest, if you make and sell your gorgeous handmade things, now is the time you need to be considering Christmas fairs, whether booking them or making extra stock to make sure you're not overworked in October-November! Getting your new product lines out there now means you have a better chance of things being picked up by magazines or other exciting advertising opportunities, and also gives people the chance to drool over them and add them to their wishlists, or to bookmark them for later. If you are considering doing some Christmas fairs, then you should start looking, and booking, fairly soon. Some places you can just book. Some places are "curated" which means you send an application (and/or a deposit) and then they let you know later whether you have been accepted. Other fairs are by invitation only. Most fairs have limits on the number of stands of any one sort, so early applications are advised especially if you work in jewellery. The definition of a good craft fair is tricky, as a good fair can mean different things to different people. A craft fair can sometimes be the only time of year an artist or crafter leaves the house and puts themself and their work "Out There", so it's a great opportunity to get feedback and gauge customer reactions to your work and pricing structure. Success for you might be getting some lovely comments on your work, it might be handing out lots of business cards or building your mailing list, it might be selling loads of stuff or it might be breaking even, or it could be a combination of any of these. It's up to you. So I'm looking for a new craft fair where people will buy all my products ... what do I do and where do I look? Well, that's a tricky one, and customers won't come flocking to your stand to salivate over your work just because you've booked a prime position at an expensive fair. These things can help you to attract new customers because it gives the impression that you are successful, but they are not the be all and end all. Having a loyal following of repeat customers who follow you and buy year after year is a much more sustainable way to build your business. A craft fair can be an opportunity. A craft fair can be a disaster. I've certainly had fairs over the years where I've stood and smiled and sold nothing, fairs where I might as well have stood in my back garden in the rain and burned a £10 note every hour for 8 hours, but those fairs have also taught me valuable lessons about how to display my work, how to advertise, how to deal with craft fair organisers and other stall holders. Always smile and be polite no matter how trying the circumstances - it does really help and word gets around very quickly if you're rude! Do your research. Work out whether the sort of people you want to sell to will shop at the sort of fairs you are planning to attend. Who is your ideal customer? Draw a picture of their life and consider how you could reach them to show them that your product is exactly what they need for their home / wardrobe / cat / dog / etc. For instance, if your theme is horses or pets, consider getting a stand at a County Show or a farmers market, or other similar outdoor event. If your theme is haute couture hats then you might be better off at a fair at or near a racecourse or wedding venue, or even taking out an advert in a fashion, horse racing or bridal magazine instead. If you specialise in wedding favours, go to a wedding fair. Also, building up trust is key to making good sales. If it's your first time at a new venue, people may walk straight past, or stop and take a look but not buy. I have had people come and chat to me for two or three years in a row before making a purchase. People love to hear about your artistic journey, the reason you made a particular piece. Customers are for life not just for Christmas. Treasure them - they are making the decision to spend their hard earned cash on an object made by you, which will be with them for many years to come. This does not mean they get discounts though. Remember you have to make a living from this. I hope that has given you some things to think about. If you have any top tips to share then please do add them in the comments :). I was recently asked how to create a fused glass handkerchief style stringer drape vase ... so thought I'd share it with you :) This free tutorial may be helpful to those who work in fused glass, and will hopefully give some of you non-fusers a bit more of an insight into some of the processes involved in making these gorgeous pieces. Handkerchief drape vases aren't a core part of my repertoire, but I thought it would be a fun project to share :) IMPORTANT NOTE: Please feel free to use this tutorial to make items to sell, should you wish to do so, and to print copies for your own use. If you want to share this tutorial with your friends, please point them at this blog post. If you would like to use this tutorial with your students, please contact me. Thank you! DISCLAIMER: This tutorial my own creation, is not based on any other specific tutorials, and is not intended to be a step by step tutorial. I accept no liability for artwork which doesn't turn out as you hoped. There are other more detailed tutorials by other artists available to purchase, should you wish to do so, or you could go on a course and support my wonderful glass colleagues that way too! Copyright Jane Cameron 2016. How to make a Stringer Drape Vase You need a cocktail shaker (stainless steel) or similar shaped object (or a proper drape vase mould, available from glass fusing suppliers - these last much longer than cocktail shakers and are much thicker and better quality stainless steel), some clear glass and some compatible stringers. You'll also need a glass fusing kiln, some kiln wash for your shelf, some pliers or mosaic nippers to cut the stringers and a glass cutter to cut the sheet glass if you're making a different size or shape. You can use a square or a circle as your base shape. A circle will give you a more “wavy” edge, while a square will give you more of a handkerchief drape shape with points. SAFETY NOTE: Always wear protective glasses and closed toed shoes when cutting glass. (Note this pic shows a chutney dish not a cocktail shaker!) Option A – Simple vase:
Option B – Crisscross vase:
Option C - Bare Stringer Vase
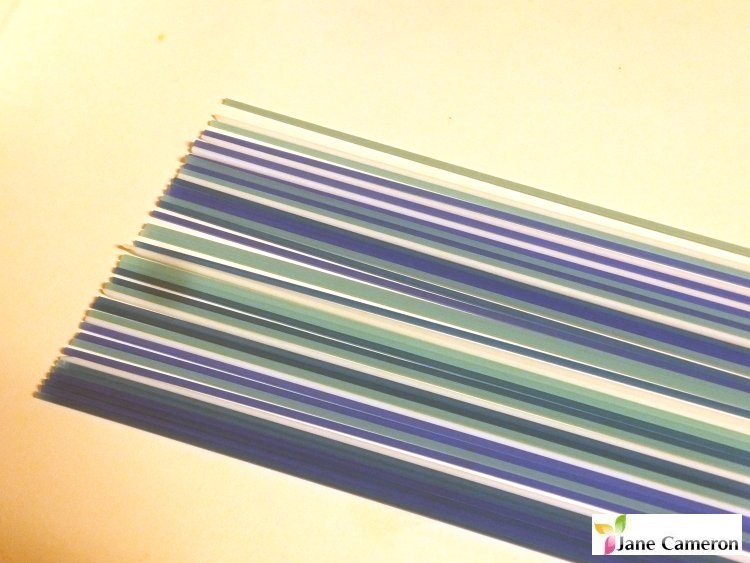
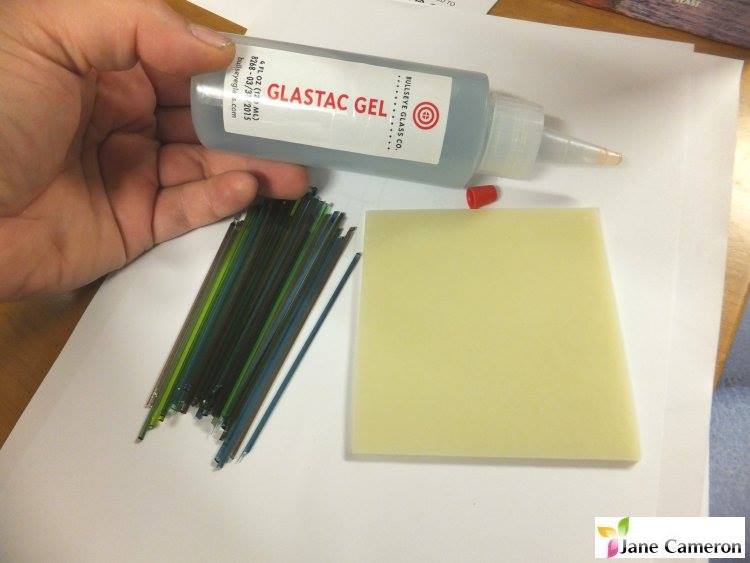
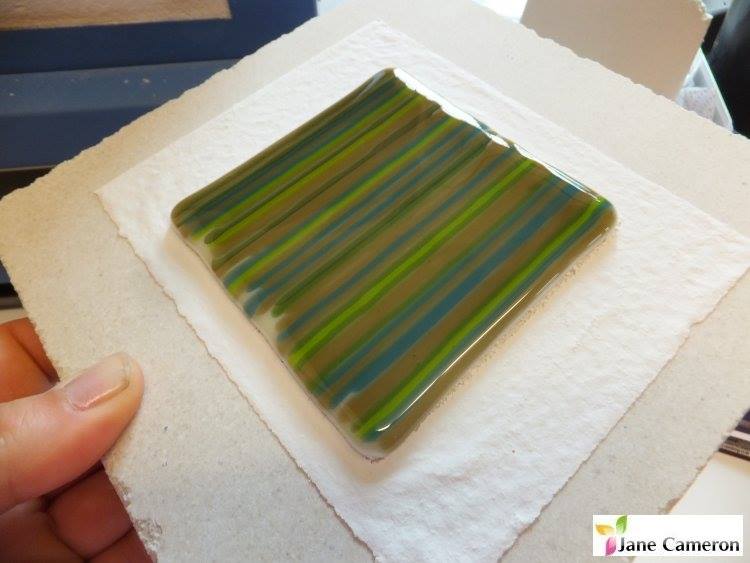
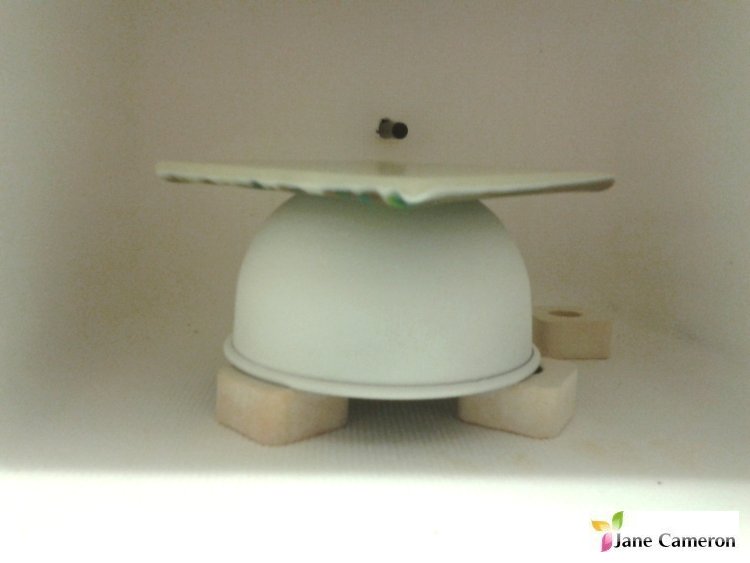
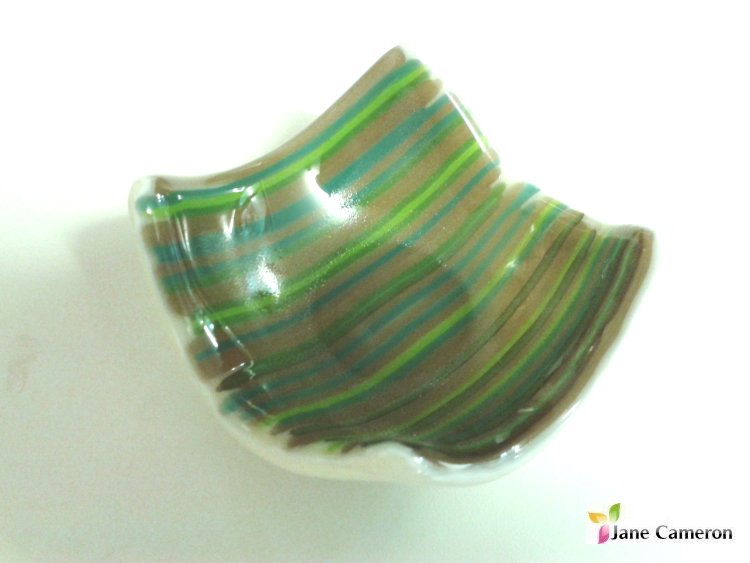
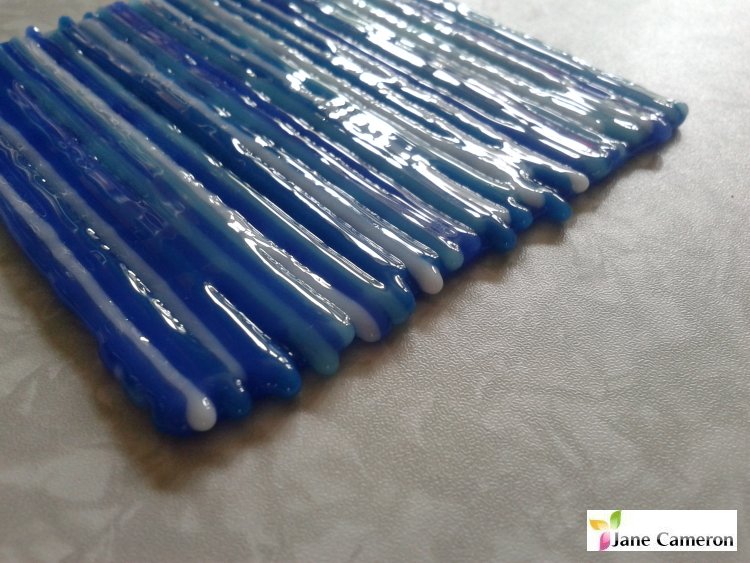
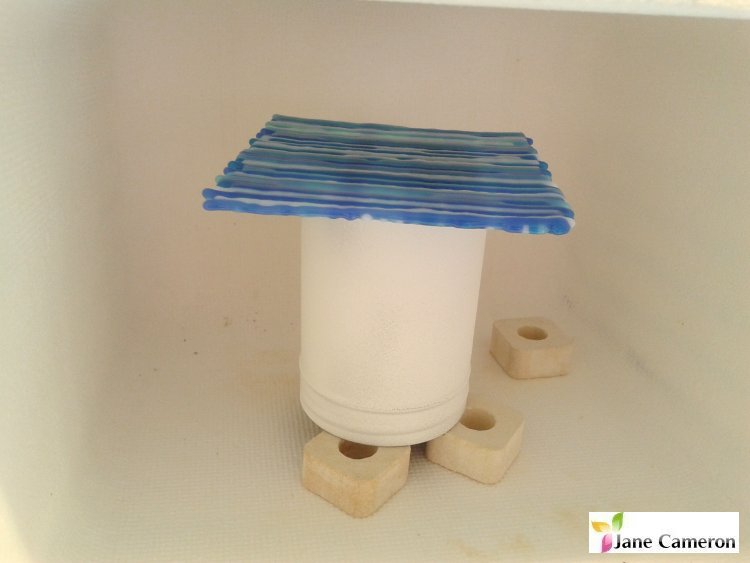
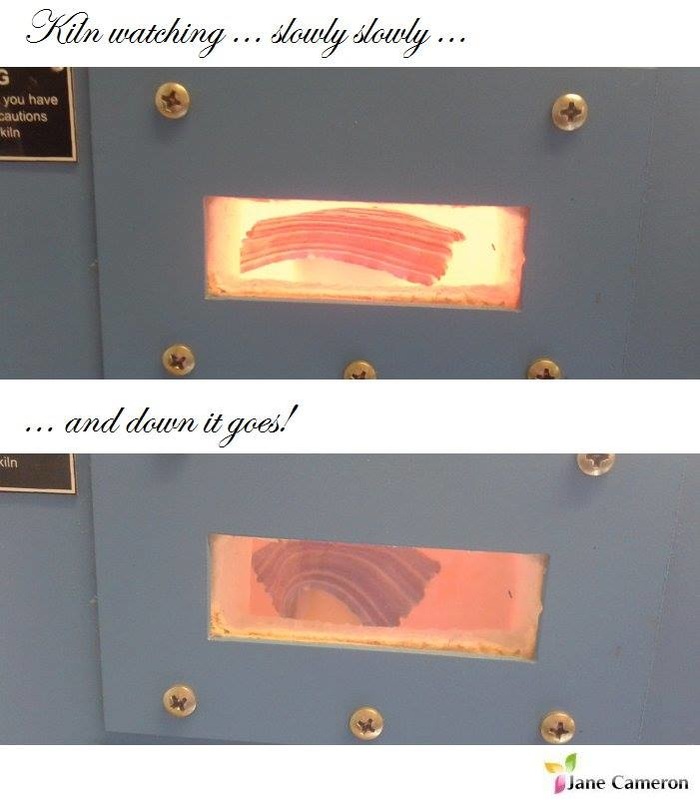
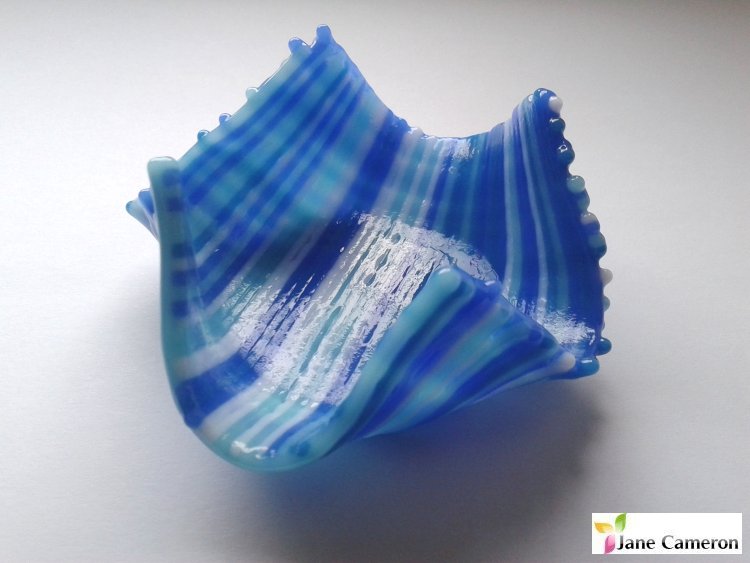
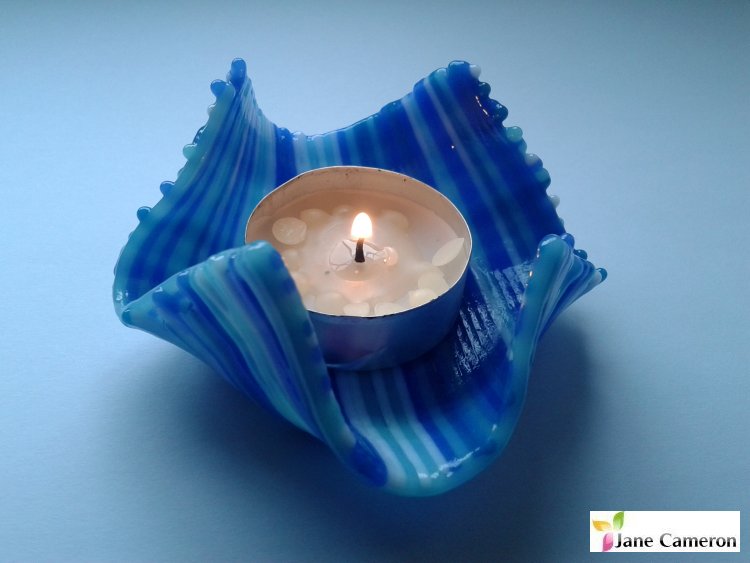
You can obviously use coloured glass instead of clear, if you'd like. You can use glasstac or other suitable fusing glue to hold the stringers in place so they don't roll about. Then full fuse (use the firing cycle appropriate for the glass you are using) to get a nice glossy stripy thing or tack fuse to keep the texture. This will give you a square or round stripy flat plate. After this, kilnwash or MR97 your cocktail shaker, put upside down in the kiln, put your square (or circle) on top and slump. Some people put a layer of thinfire paper on too, between the metal and the glass, to make doubly sure it won't stick. As the kiln heats up, the vase will droop down and form lazy ripples around the shaker. Don't let it go too far down cos if you overslump it then it can hug the shaker too tightly. Once it's draped enough, forward your kiln programme on to the "annealing" segment. SAFETY NOTE: Always wear appropriate glasses and heat protection (proper gloves and clothes made from natural fibres!) when peeking in your kiln - you can get special infrared filter glasses which stop the glow from damaging your eyes. Remember not to get too close - I'm sure you like your eyebrows! You can also do these drape vases in tealight size using those little chutney dishes they use in curry restaurants! I sometimes prop those up on a kiln post or something so that the edges can flop down past the edge of the dish. It's a good idea to only do one of these in your kiln at a time, because different colours of glass melt at different speeds. I'll update this post with progress pics later! As you can see, although of relatively simple construction, these vases and bowls do require a certain amount of attention and take at least two days to make and shape. Have fun! :) UPDATE 11th June 2016: Wow! I had no idea that this free tutorial would be so popular! Thank you so much to everyone who commented. I look forward to seeing what you create! As requested by loads of you on Facebook, I have made a couple of tealight size samples to give you an idea of the finished product. This green one is one layer of glass with stringers on top, full fused: This blue one is two layers of stringers, tack fused: I hope that these pictures give you a better idea of what to expect when making items like this, not only how different layups look but also how the shape of your mould can affect the finished item. You can of course make bigger ones, but I decided I wanted to make little ones :).
Happy fusing! |
Jane Cameron
Experienced silk painter, glass fuser, teacher, enthusiastic and inspirational. Archives
June 2019
Categories |
 RSS Feed
